BUILDING A RIBBON FORGE
*
BUILDING A RIBBON FORGE *
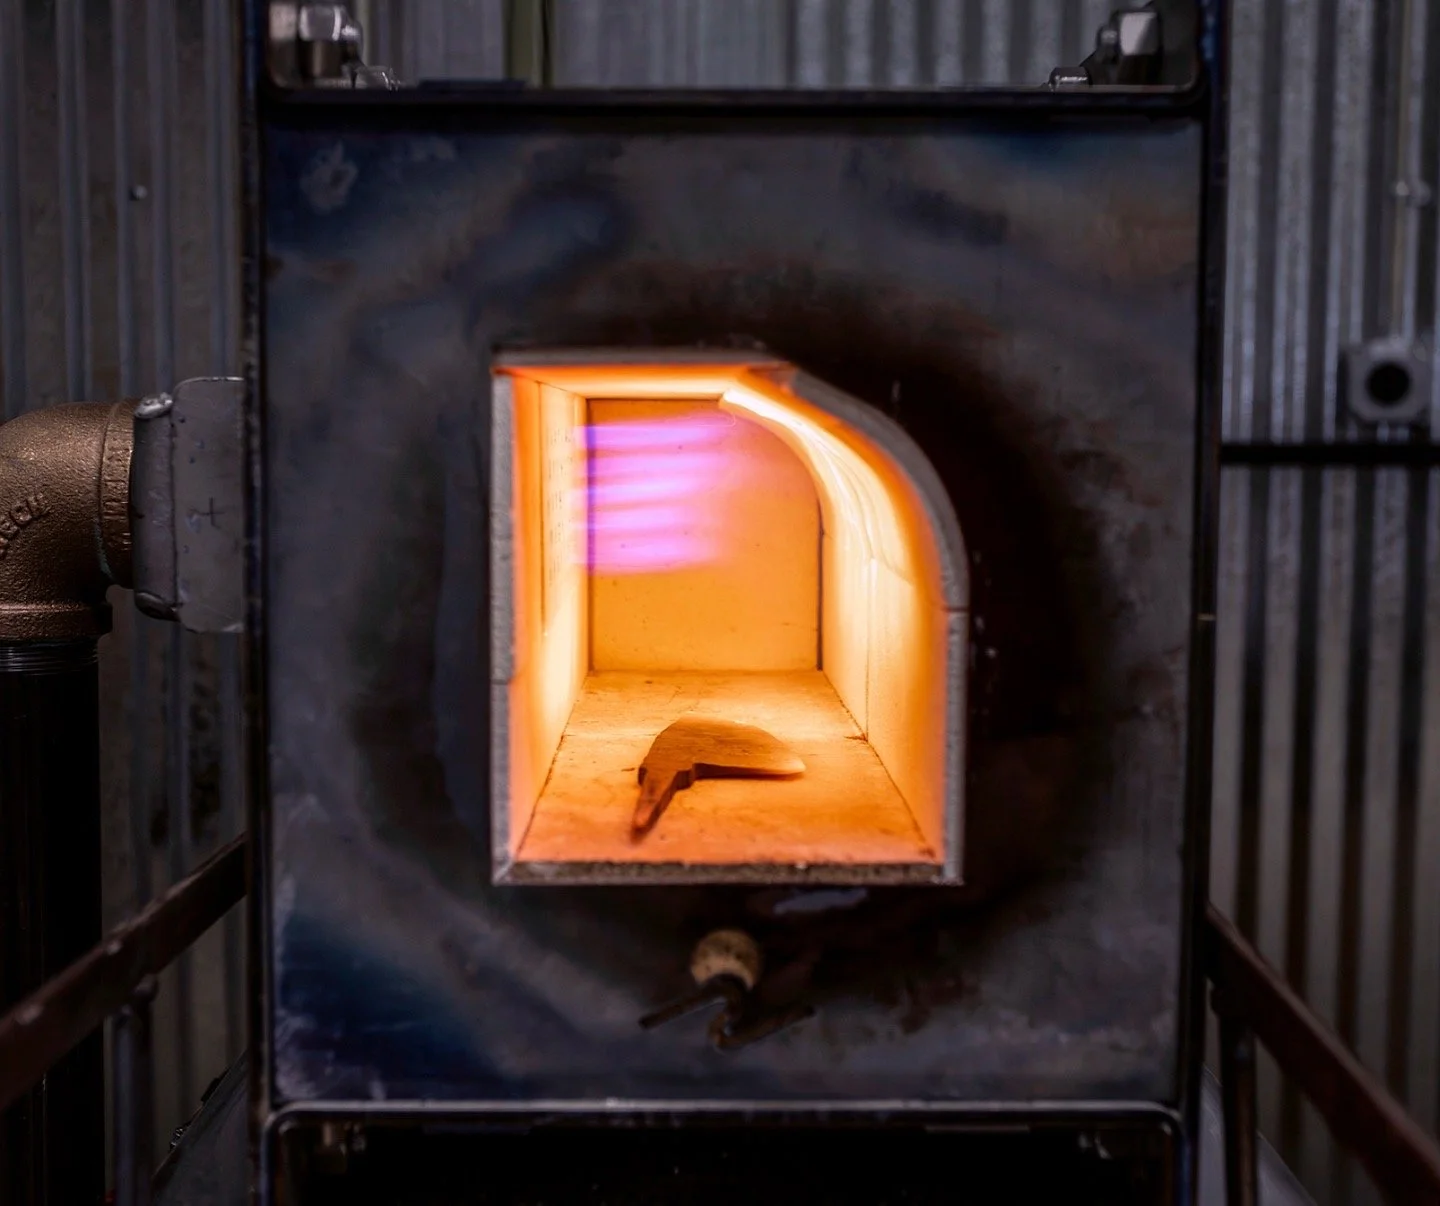
The forges that I designed and fabricated for my shop were based on many different models that I’ve used or researched. Most notably, the ribbon burner forge I used during my time at Wick’s Forge and the Apollo Forge from Housemade. I poked around a lot of different blacksmith forums when coming up with the design, and I am very thankful to Eric from Flemming Knives who gave me such great feedback for working with a low pressure system. I’ve added the CAD plans that I made for the body of the forge, and all of the different fixtures and hardware needed to build your own.
The specific features that make this design unique for my needs are: a slim heating chamber to contain heat and preserve energy for forging smaller objects, a curved corner to efficiently circulate heat to the floor of the forge, fixtures and hoses with large ports and diameters to allow low pressure (sub 2 psi) natural gas to maintain a high flow rate, built in arms to hold longer stock, and a bolted frame that’s easy to take apart and repair. There are a few finicky details that I haven’t laid out here, so please reach out to me if you’re building your own and have any questions! The files are to scale and all fit together snuggly with the supplied firebrick. I got them laser cut with SendCutSend out of .188” mild steel. I tried as much as possible to not source hardware from antichrist Bezos, but I’m not perfect.
The Nuts & Bolts
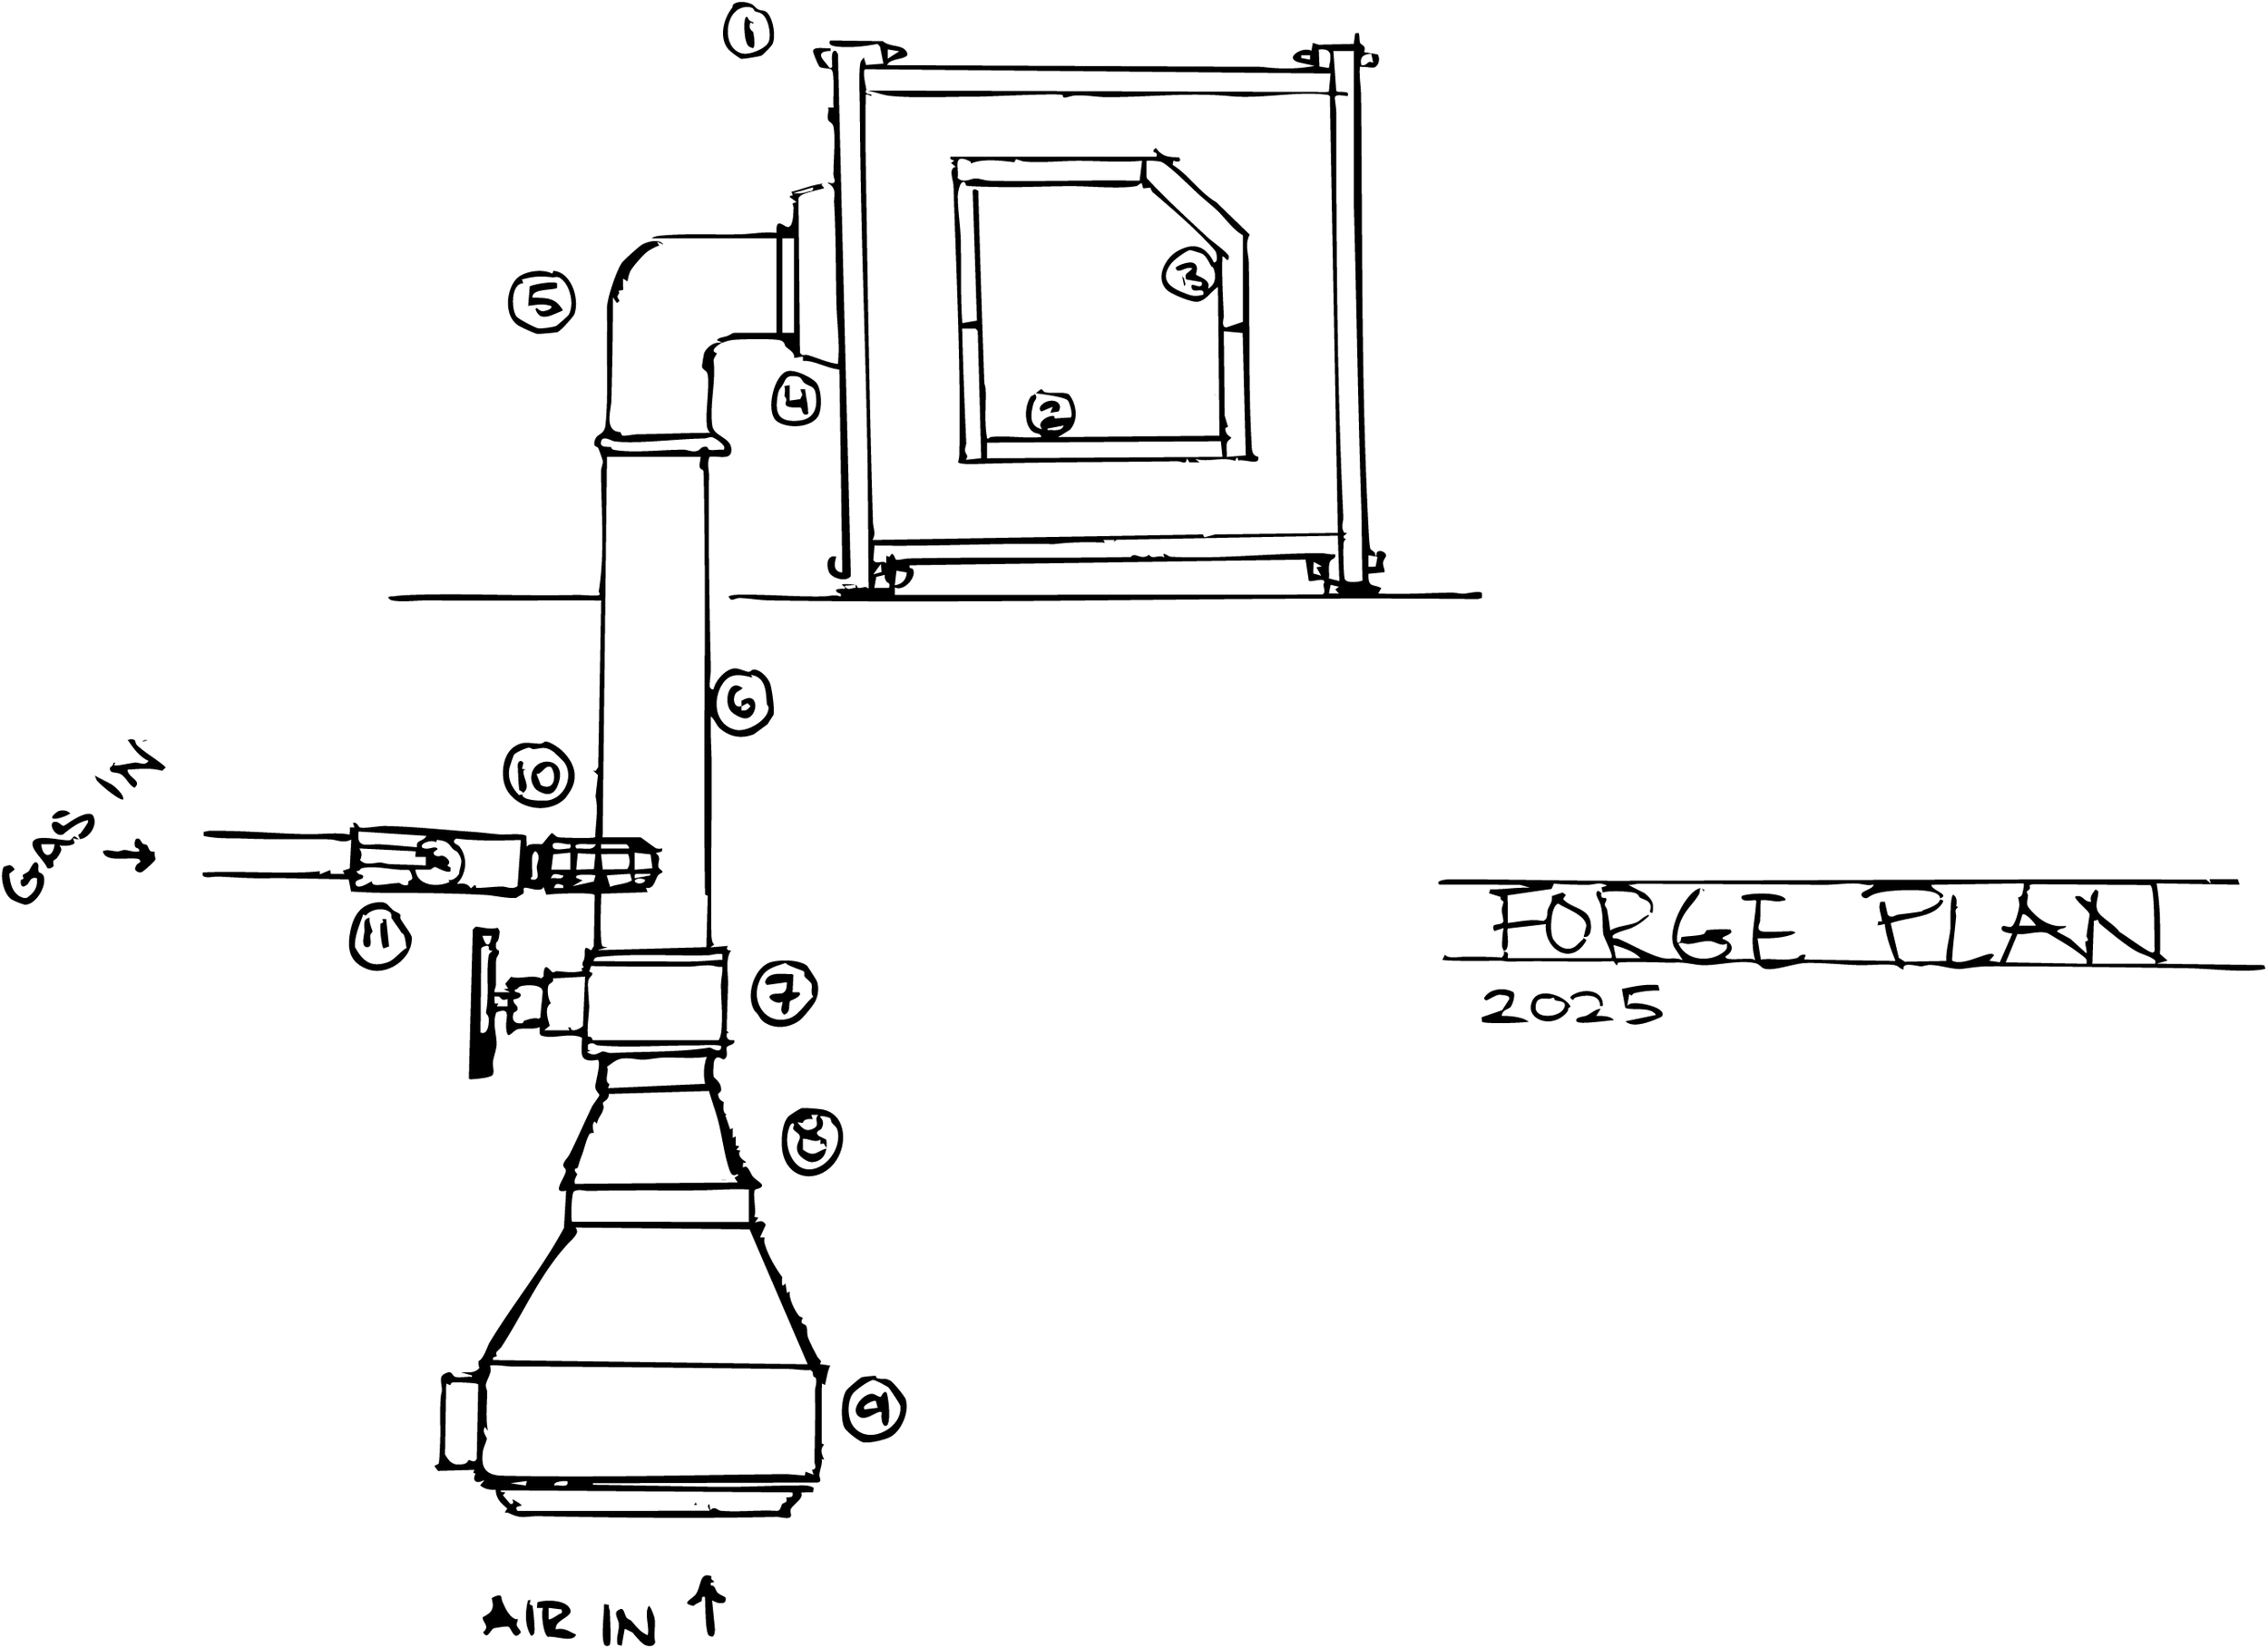
Hardware for assembling the forge body
Firebrick for the floor of the forge
Firebrick for walls and ceiling
Pipe elbow to connect to burner
Pipe for merging gas and air supply
Gate valve for air control
Fan coupler to connect to pipe
Fan for air circulation
Gas supply elbow to connect to pipe
Ball valve for gas control